Storm & Disaster Damage
How to Protect Your Belongings During the Restoration Process
October 20, 202511 min read
T
Tyler McClelland· Mitigation Manager, Hudson Valley Region (NY)
Tyler McClelland leads mitigation operations for Advanced DRI across New York's Hudson Valley, directing water, mold, and large-loss response in the field. He holds IICRC Water Restoration Technician (WRT) and Applied Microbial Remediation Technician (AMRT) certifications and a New York State Mold Supervisor certification, and is trained in IRCA hospital safe construction practices recognized by The Joint Commission.
IICRC Water Restoration Technician (WRT), IICRC Applied Microbial Remediation Technician (AMRT), NY State Mold Supervisor Certification, Lead RRP Certification, OSHA Bloodborne Pathogens Training, IRCA Hospital Safe Construction Practices (TJC), Large Loss Mastery Estimating CertifiedLinkedIn
Published October 20, 2025 · Updated May 27, 2026

Learn how to protect belongings during restoration with expert packing tips, contents protection strategies and restoration storage solutions.
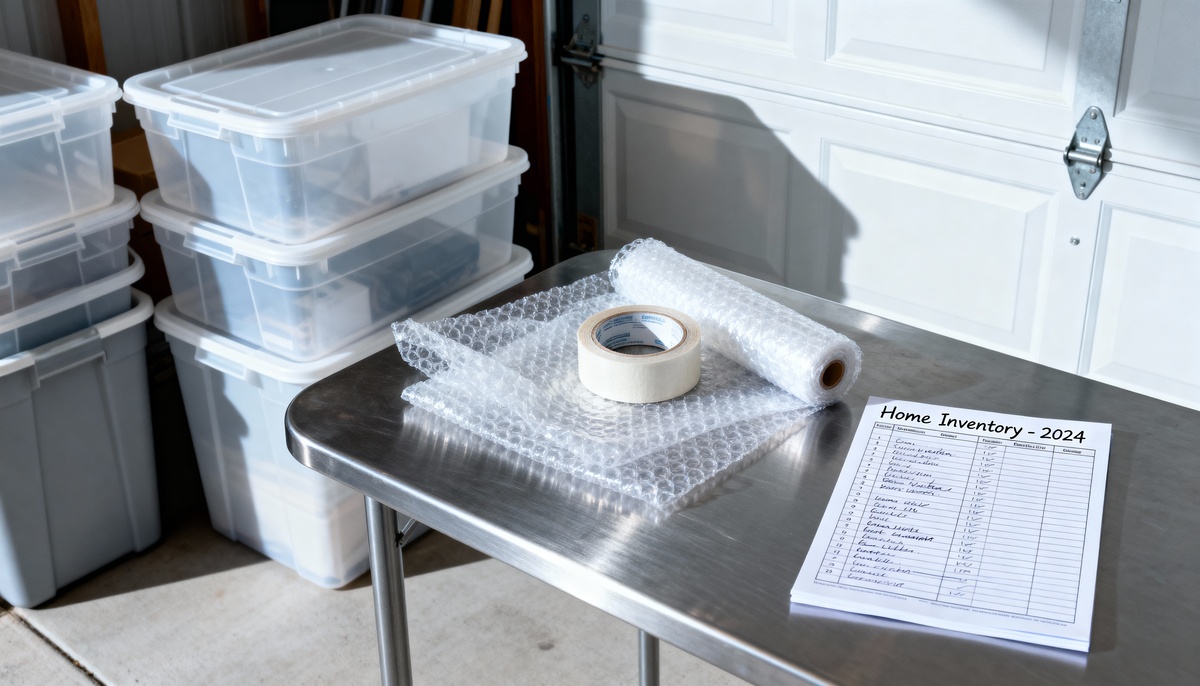
What You'll Need
Tools:
- Camera or smartphone (for documentation)
- Permanent markers (for labeling)
- Packing tape and dispenser
- Furniture dolly (for heavy items)
- Work gloves (for handling debris)
Materials:
- Plastic bins with lids (various sizes from hardware stores)
- Heavy-duty plastic sheeting (6 mil thickness minimum)
- Moving blankets or drop cloths
- Bubble wrap and packing paper
- Large garbage bags (for textiles)
- Cardboard boxes (for non-damaged items only)
- Zip-top bags (for small items and hardware)
Time Required:
⏱️ Documentation: 30-60 minutes ⏱️ Packing: 2-4 hours ⏱️ Moving items: 1-2 hours⚠️ Safety First
Before you begin:- Get clearance from your insurance adjuster to move items
- Wear gloves and masks if mold or smoke odors are present
- Ensure electrical power is safe in affected areas
- Watch for structural damage that makes areas unsafe
- Never enter standing water without professional clearance
Step-by-Step: How to Protect Belongings During Restoration
Step 1: Document Everything Before Moving
Take photos or videos of your belongings in their current state and location. This documentation proves what you owned, its condition, and where it was damaged. Photograph each room from multiple angles, then take close-ups of valuable items and any visible damage. 💡 Why this matters: Insurance claims require proof of ownership and damage. Photos taken before you move anything are your strongest evidence. ✅ Success looks like: Clear photos showing the entire room layout, readable labels on items, and detailed shots of damage to specific belongings.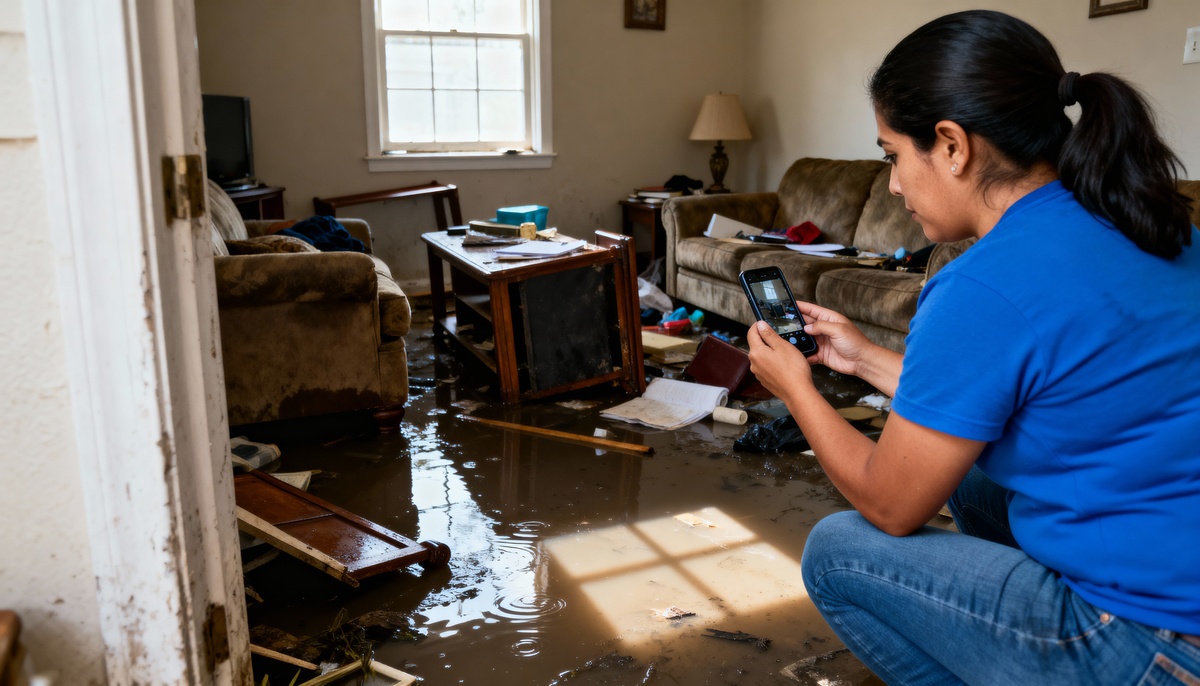
Step 2: Categorize Items by Priority
Sort your belongings into four categories before you start packing. This system helps you protect belongings during restoration by ensuring the most critical items get immediate attention:| Category | What It Includes | Action Needed | Timeline |
|---|---|---|---|
| Critical | Documents, medications, daily essentials | Pack first, keep accessible | Immediate |
| Salvageable | Undamaged items in restoration zones | Protect and move to safe area | Within 24 hours |
| Damaged | Items affected by water/fire/mold | Separate for professional cleaning | Within 48 hours |
| Total Loss | Unsalvageable items | Document and dispose properly | After adjuster approval |
Step 3: Pack Room by Room Using Proper Materials
Start with rooms farthest from the damage and work your way toward affected areas. This prevents cross-contamination and helps you stay organized. Use plastic bins for anything going into storage, as cardboard can harbor moisture and mold. Proper packing tips are essential to protect belongings during restoration work. Packing tips by item type: 🔧 Electronics: Wrap each device in bubble wrap, place in plastic bins with silica gel packets, and label clearly. Keep power cords with their devices in labeled zip-top bags. 📚 Books and Documents: Stand books upright in plastic bins, never stack flat. Place important documents in sheet protectors inside sealed plastic bags. If books are damp, professional restoration is needed within 48 hours. 👕 Clothing and Textiles: Clean, undamaged items go in garbage bags or bins. Smoke or water-damaged textiles must be kept separate for professional cleaning. Don't mix clean and contaminated items. 🖼️ Artwork and Photos: Never stack photos or artwork directly on top of each other. Use packing paper between each piece, stand upright in bins, and mark "FRAGILE - THIS SIDE UP" clearly. ✅ Success looks like: Each container is clearly labeled with room name, contents description, and handling instructions. Nothing is overloaded or difficult to seal.Step 4: Protect Furniture and Large Items
Furniture remaining in your home during restoration needs contents protection from dust, debris, and moisture. Move what you can to undamaged areas, and cover what must stay in place. For movable furniture: Wrap completely in plastic sheeting, securing with packing tape. Place furniture on plastic sheeting on the floor to prevent moisture wicking from below. Create a clear path so restoration workers can access all areas. For fixed items: Cover with heavy-duty plastic sheeting secured with tape. Seal all edges to prevent dust infiltration. Use multiple layers for items in high-traffic work zones. 💡 Pro tip: Take photos of furniture from all angles before covering. This helps if you need to file additional insurance claims later and provides documentation of your efforts to protect belongings during restoration.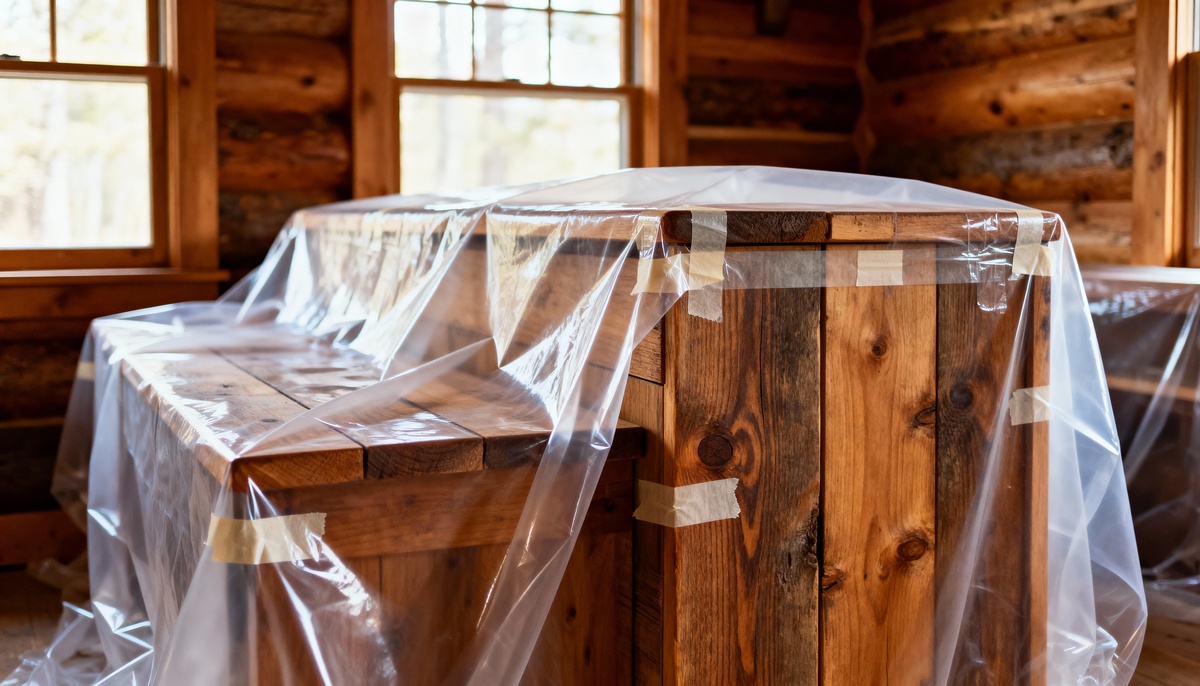
Step 5: Create Safe Zones for Packed Items
Designate specific areas away from restoration work for your packed belongings. The ideal safe zone is climate-controlled, secure, and accessible if you need something. Strategic restoration storage planning is key to protecting your possessions. Best storage locations:- Undamaged rooms: Close doors and seal with plastic if dust is a concern
- Garage: Elevate bins on shelving, away from the floor and walls
- Off-site storage: Climate-controlled units for extended restoration projects
- POD or container: Placed on your property for easy access
Step 6: Maintain an Inventory System
Create a master list of everything you've packed and where you've stored it. This restoration storage tracking system helps you find items quickly and supports your insurance claim while you protect belongings during restoration. Your inventory should include:- Box or bin number
- Contents description
- Room of origin
- Storage location
- Condition notes
- Estimated value for insurance
Step 7: Coordinate with Restoration Professionals
Communicate with your restoration team about which areas contain packed belongings and which items cannot be moved. Mark safe zones clearly and provide your inventory to the project manager. Questions to ask your restoration team:- Which rooms will be completely cleared?
- How long will the restoration take?
- Will they provide contents protection services?
- Do they offer pack-out and restoration storage?
- What cleaning services are included?
Troubleshooting Common Problems
Problem: Items smell like smoke even after packing. Solution: Don't seal contaminated items in airtight containers. Place in breathable bags and label for professional cleaning. Odors can transfer to other belongings and set permanently if sealed in. Problem: Not enough space for all packed items. Solution: Consider professional pack-out services. Many restoration companies offer restoration storage facilities designed specifically to protect belongings during restoration. This also creates more workspace for contractors. Problem: Unsure if items can be saved. Solution: Keep everything until a contents specialist evaluates it. Professional restoration can save items that appear ruined, including electronics, documents, and textiles. Let experts make the final determination. Problem: Running out of packing supplies. Solution: Many restoration companies provide packing materials as part of their service. Ask before purchasing more supplies. Your insurance may also cover packing material expenses.🔴 When to Call a Professional for Contents Protection
Stop and call a restoration professional if:- The damage affects more than two rooms extensively
- You have valuable collections requiring specialized handling (antiques, art, instruments)
- Mold is visible on belongings
- Electronics or documents were water-damaged
- You need secure, climate-controlled restoration storage
- The restoration timeline exceeds two weeks
- You're physically unable to pack and move items safely
- Contents require professional cleaning before storage
Preventive Measures for Future Disasters
Create a home inventory now: Don't wait for disaster to strike. Photograph or video every room in your home annually, including inside closets, drawers, and cabinets. Store this documentation in cloud storage or off-site so you're prepared to protect belongings during restoration if needed. Keep important documents accessible: Store original documents like deeds, titles, and birth certificates in a fireproof, waterproof safe. Keep digital copies in secure cloud storage. Maintain your property: Regular maintenance prevents many disasters. Check for leaks, clean gutters, service HVAC systems, and address small problems before they become emergencies requiring full restoration. Review your insurance coverage: Understand what your policy covers for contents protection, restoration storage, and pack-out services. Many homeowners discover too late that their coverage is inadequate.Next Steps After Your Restoration
Once restoration work is complete, professional cleaning precedes unpacking. Don't rush to move items back into freshly restored spaces. Allow proper drying time as specified by your restoration contractor, typically 24-72 hours after final work is finished. Before unpacking:- Verify all restoration work is complete and passed final inspection
- Ensure the property is thoroughly cleaned of dust and debris
- Check that HVAC systems are running properly
- Confirm humidity levels are normal (30-50%)
- Inspect for any remaining odors or moisture issues
Frequently Asked Questions
Should I pack everything myself or hire professionals for contents protection?
For minor damage affecting one or two rooms, DIY packing using proper packing tips works well. However, extensive damage, valuable collections, or situations requiring restoration storage benefit from professional pack-out services. Professionals have specialized materials, climate-controlled facilities, and experience to protect belongings during restoration effectively. Your insurance may cover these services, so check your policy before deciding.
How long can items stay in restoration storage safely?
Items can remain in proper restoration storage for several months safely when stored in climate-controlled conditions. Professional facilities maintain optimal temperature and humidity levels to prevent mold, warping, or deterioration. Document the storage timeline with your insurance company, as coverage for storage duration varies by policy. Most restoration projects complete within 2-8 weeks, though extensive damage may require longer storage periods.
What's the biggest mistake people make when trying to protect belongings during restoration?
The most common mistake is sealing contaminated items in airtight containers before professional cleaning. Smoke odors, moisture, and mold spores become permanently embedded when sealed in. Instead, use breathable bags for damaged items and label them for professional restoration. Also, many people discard items prematurely—always wait for insurance documentation before disposing of anything, even items that appear unsalvageable.
Can I use cardboard boxes for packing during restoration?
Use cardboard boxes only for completely undamaged items in dry areas. For anything in or near affected zones, plastic bins with tight-fitting lids are essential for contents protection. Cardboard absorbs moisture, can harbor mold spores, and weakens when exposed to humidity from restoration work. The small extra cost of plastic bins prevents additional damage to your belongings during the restoration process.
Do I need to empty every drawer and cabinet before restoration work begins?
Not necessarily. If furniture is in rooms where no work is occurring and will be covered with plastic sheeting, contents can often remain in place. However, furniture in active work zones should be emptied to prevent dust infiltration and make items accessible if needed. Ask your restoration contractor which areas require complete clearing. Kitchen and bathroom cabinets in damaged areas should always be emptied as these spaces need thorough cleaning and drying.
Professional Help to Protect Belongings During Restoration
When disaster damages your home, knowing how to protect belongings during restoration requires immediate action and the right approach. Following these packing tips and utilizing proper contents protection methods ensures your possessions remain safe throughout the restoration process. Whether you handle it yourself or opt for professional pack-out and restoration storage services, the key is acting quickly, staying organized, and communicating clearly with your restoration team. Remember, your belongings represent memories, investments, and daily necessities. Taking time to protect belongings during restoration prevents additional losses and helps your home and life return to normal faster. When in doubt, consult with restoration professionals who can assess your situation and recommend the best contents protection strategy for your specific needs. Need professional help to protect belongings during restoration? Contact our team for expert pack-out services, specialized cleaning, and secure restoration storage solutions. We'll handle your possessions with care while restoring your home to pre-loss condition. Available 24/7 for emergency restoration services.Categories
Need Restoration Services?
Our team is available 24/7 for emergency response. Call us today for a free phone consultation.


Questions About Restoration?
Our experts are ready to help. Contact us for a free consultation.