How to Prevent Mold After Water Damage: A Homeowner's Action Plan
Elsa Boyer is a Regional Operations Manager for Advanced Disaster Recovery, based in Harrisburg, Pennsylvania, overseeing commercial and healthcare restoration projects. She holds a Bachelor of Arts from Valparaiso University and a deep certification portfolio, including ICRA Certified Healthcare Remediator Supervisor and multiple IICRC designations across commercial drying, structural drying, water, and fire & smoke restoration.

Learn how to prevent mold after water damage with our complete 48 hour action plan. Expert mold prevention steps, tools needed, and when to call professionals.
What You'll Need to Prevent Mold After Water Damage
Tools to Prevent Mold After Water Damage:
- 🔧 Wet/dry vacuum (for water extraction)
- 🔧 Dehumidifier (removes moisture from air)
- 🔧 Air movers or fans (increases air circulation)
- 🔧 Moisture meter (available at hardware stores, measures hidden moisture)
- 🔧 Infrared thermometer (optional, detects temperature differences indicating moisture)
- 🔧 Pry bar (for removing baseboards if needed)
Materials Needed to Prevent Mold After Water Damage:
- Heavy-duty trash bags
- Rubber gloves and N95 masks
- Antimicrobial spray (EPA-registered)
- Plastic sheeting (to contain affected areas)
- Duct tape
- Cleaning cloths and sponges
- Disinfectant solution
Time Required to Prevent Mold After Water Damage:
⏱️ Initial Response: 2-4 hours ⏱️ Drying Process: 3-5 days of monitoring ⏱️ Follow-up Checks: 10 minutes daily for 2 weeksSafety First: Precautions to Prevent Mold After Water Damage
- ✅ Turn off electricity to affected areas if water is present
- ✅ Wear N95 mask, gloves, and eye protection
- ✅ Ensure adequate ventilation by opening windows
- ✅ Document everything with photos for insurance
- ✅ Check for structural damage before entering
- Water damage covers more than 10 square feet
- Water is Category 2 (gray water) or Category 3 (black water/sewage)
- You have respiratory issues or compromised immunity
- Mold is already visible and widespread
- Structural damage is present
Understanding the 24-48 Hour Window to Prevent Mold After Water Damage
Mold spores are everywhere in the environment, but they need moisture to grow. After water damage, you have a critical window of 24-48 hours before mold colonies establish themselves. This is your prime opportunity for mold growth prevention. Acting quickly dramatically reduces the likelihood of a mold problem developing. Temperature also plays a role—mold thrives in warm environments (77-86°F). If water damage occurs during summer months, your window may be even shorter.The Science Behind How to Prevent Mold After Water Damage
To effectively prevent mold after water damage, it helps to understand what mold needs to grow. Mold requires four conditions: moisture, organic material (like wood or drywall), appropriate temperature, and time. By removing moisture quickly, you eliminate the most controllable factor in this equation. Mold spores are microscopic and constantly present in indoor air. When these spores land on wet surfaces, they germinate and begin forming colonies. The colonization process starts invisibly—by the time you see mold, it's already well-established. This is why proactive steps to prevent mold after water damage are so critical. Prevention is far easier than remediation. Different types of mold have different moisture requirements, but most common indoor molds need materials with moisture content above 16% for wood or any dampness in porous materials like drywall. Maintaining materials below these thresholds is essential to prevent mold after water damage successfully.Step-by-Step Guide to Prevent Mold After Water Damage
Step 1: Stop the Water Source (Immediate)
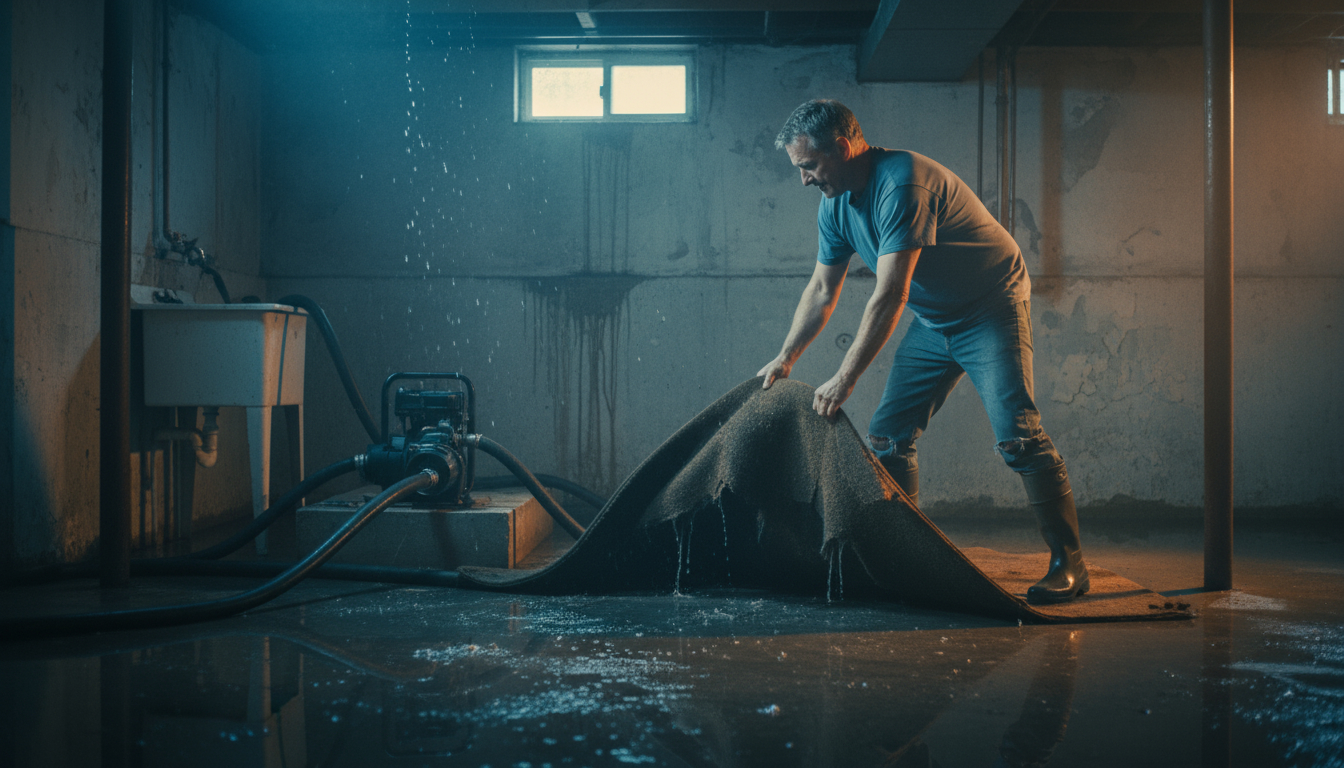
What to do: Identify and stop the source of water intrusion. Turn off the main water valve if a pipe burst, place buckets under active leaks, or cover roof damage with tarps. Why it matters: Continuing water flow makes all other efforts futile. You can't dry out an area that's still getting wet. Success looks like: No new water entering the affected space. 💡 Tip: Take photos and videos before touching anything for insurance documentation.Step 2: Remove Standing Water (First 2 Hours)
What to do: Use a wet/dry vacuum to extract standing water from floors and carpets. Work systematically from one end of the room to the other. For large amounts of water, you may need to empty the vacuum multiple times. Why it matters: Standing water is the primary moisture source for mold. The longer it sits, the more it saturates building materials and creates ideal conditions for mold growth prevention failure. Success looks like: No visible puddles or standing water on surfaces. ⚠️ Warning: Don't use regular household vacuums—they're not designed for water and create electrical hazards.Step 3: Remove Wet Materials (Within 24 Hours)
 What to do: Remove and dispose of items that cannot be dried within 48 hours:
- Soaked carpeting and padding
- Wet insulation
- Saturated drywall (especially bottom portions)
- Wet upholstered furniture
- Cardboard boxes and paper products
Step 4: Increase Air Circulation (Ongoing)
What to do: Position multiple fans to create cross-ventilation. Place air movers at 45-degree angles to floors to maximize airflow across surfaces. Open windows and doors if outdoor humidity is below 60%. Proper air circulation is a key strategy to prevent mold after water damage. Why it matters: Moving air accelerates evaporation dramatically. Stagnant air allows moisture to linger on surfaces, giving mold spores time to germinate. Air circulation is one of the most important factors to prevent mold after water damage. Success looks like: You can feel continuous air movement throughout the affected space, and surfaces feel progressively drier each day. Good air circulation is essential to prevent mold after water damage.| Fan Placement | Best For | Position | Duration |
|---|---|---|---|
| Direct Surface Drying | Floors, walls | 45° angle, 3-4 feet away | 72+ hours continuous |
| Cross Ventilation | Rooms, hallways | Opposite corners, facing each other | Until completely dry |
| Exhaust Ventilation | Removing humid air | Near windows/doors, blowing out | Throughout drying process |
| Cabinet/Closet Drying | Enclosed spaces | Inside with doors open | 48-72 hours minimum |
Step 5: Deploy Dehumidifiers (Within 24 Hours)
What to do: Place dehumidifiers in the center of affected rooms. Empty collection tanks regularly (every 8-12 hours) or route drainage hose to sink or exterior. Aim to reduce indoor humidity to 30-50%. Why it matters: While fans move air, dehumidifiers actually remove moisture from it. This is critical for post-water damage recovery because high humidity prevents surfaces from drying and creates perfect conditions for mold. Using dehumidifiers effectively helps prevent mold after water damage. Success looks like: A hygrometer reads 30-50% relative humidity, and you notice water collecting in the dehumidifier tank. Proper humidity control is fundamental to prevent mold after water damage. 💡 Tip: For every 500 square feet, you need approximately 30 pints of dehumidification capacity per day during active drying. Proper equipment sizing is crucial to prevent mold after water damage in larger spaces.Step 6: Monitor Moisture Levels (Daily for 2 Weeks)
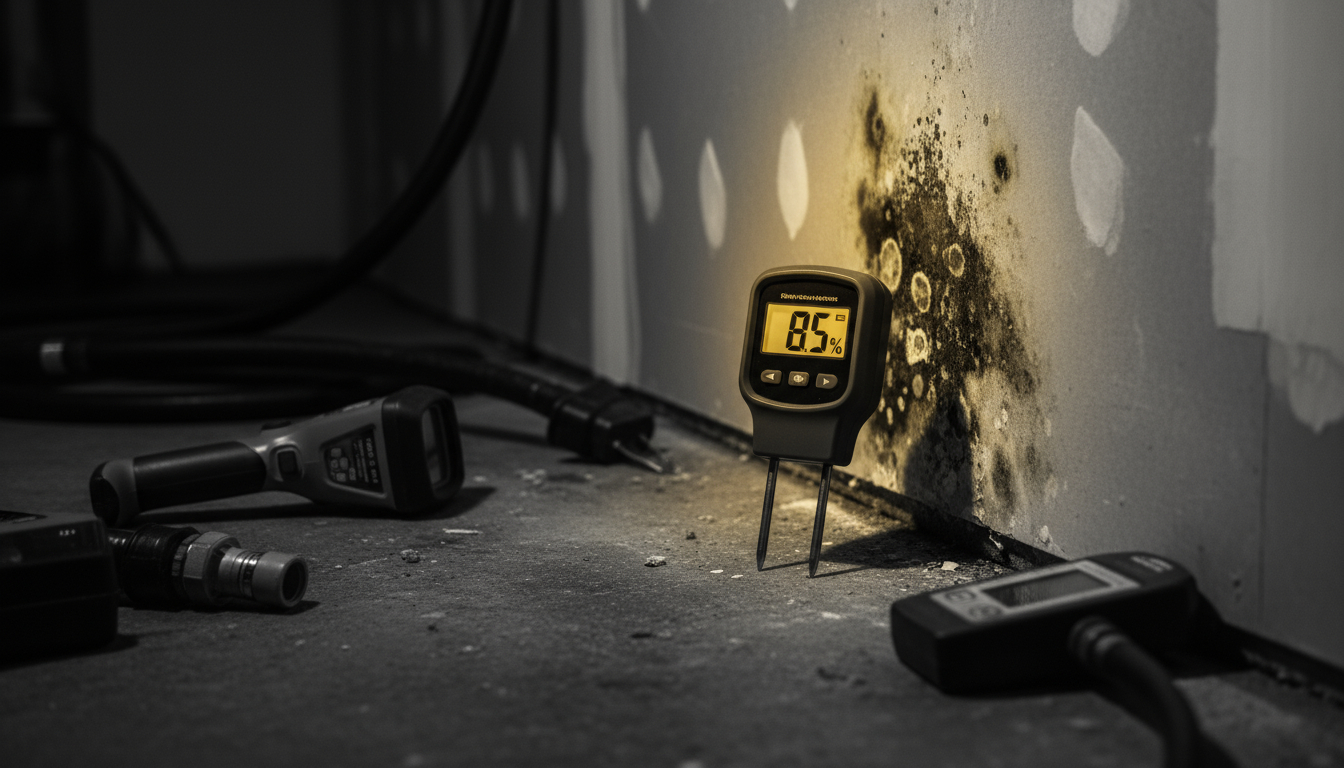
What to do: Use a moisture meter to check floors, walls, and hidden areas daily. Test the same spots each time and record readings. Pay special attention to areas that were heavily saturated. Consistent monitoring is essential to prevent mold after water damage. Why it matters: Visual inspection alone is unreliable. Materials may look dry on the surface while harboring moisture inside. Moisture meters detect this hidden dampness where mold loves to grow. Accurate moisture detection is fundamental when you work to prevent mold after water damage. Success looks like: Moisture readings steadily decline over 3-5 days and stabilize at normal levels (typically below 16% for wood, below 1% for drywall). Achieving these levels confirms your efforts to prevent mold after water damage are working.| Material | Dry Reading | Elevated Reading | Saturated Reading |
|---|---|---|---|
| Wood flooring | 6-12% | 12-20% | 20%+ |
| Drywall | 0-1% | 1-3% | 3%+ |
| Concrete | 0-4% | 4-8% | 8%+ |
| Carpet/padding | 5-15% | 15-25% | 25%+ |
Step 7: Clean and Disinfect Surfaces (After Drying)
What to do: Once surfaces are completely dry, clean all affected areas with a disinfectant solution. Mix 1 cup of bleach per gallon of water for non-porous surfaces, or use EPA-registered antimicrobial cleaners. Wipe down walls, floors, and any items that got wet. Proper cleaning helps prevent mold after water damage. Why it matters: Even if visible mold hasn't appeared, dormant spores may be present. Cleaning eliminates these spores and prevents future growth as part of comprehensive mold prevention. This cleaning step is your final defense to prevent mold after water damage. Success looks like: All surfaces are clean, smell fresh, and show no signs of discoloration or musty odors. A clean environment is the final step to prevent mold after water damage. ⚠️ Warning: Never mix bleach with ammonia or other cleaners—this creates toxic fumes. Always ensure proper ventilation when using cleaning chemicals.Step 8: Inspect Hidden Areas (Days 3-7)
What to do: Check inside wall cavities (by removing baseboards or drilling small inspection holes), under flooring, inside cabinets, and in HVAC systems. Use a flashlight and moisture meter to detect problems. Why it matters: Mold doesn't need light to grow—it thrives in dark, hidden spaces. Wall cavities, subfloors, and ductwork are prime locations for hidden mold growth after water damage. Inspecting these areas is critical to successfully prevent mold after water damage. Success looks like: All hidden areas test dry on the moisture meter, show no visible signs of mold, and have no musty odors. Thorough inspection of hidden areas is crucial to prevent mold after water damage in places you can't normally see. 💡 Tip: If you removed baseboards, leave them off for several extra days to ensure wall cavities are completely dry before reinstalling. Patience here helps prevent mold after water damage in wall cavities.Troubleshooting Common Issues When You Prevent Mold After Water Damage
Problem: Materials Aren't Drying Fast Enough
Solution: Increase air movement by adding more fans or repositioning existing ones. Raise indoor temperature to 70-80°F if possible (heat accelerates evaporation). Verify dehumidifier is working properly and tanks aren't full. In extreme cases, you may need to remove more material that's acting as a moisture reservoir. Fast drying is crucial to prevent mold after water damage.Problem: Musty Smell Develops
Solution: This indicates mold growth has likely begun. Use your moisture meter to find the source—mold odor means moisture is present. Increase drying efforts in that area immediately. If the smell persists after thorough drying, you may need professional mold remediation. Addressing odors quickly helps you prevent mold after water damage from worsening.Problem: Humidity Won't Drop Below 60%
Solution: Check if outdoor humidity is very high—if so, close windows and rely solely on dehumidifiers. Ensure dehumidifier is properly sized for your space. Create contained drying zones using plastic sheeting if trying to dry a large area. Consider that hidden water sources may still be present. Controlling humidity is essential to prevent mold after water damage.Problem: Moisture Readings Plateau Above Normal
Solution: This suggests water is trapped in areas you can't access, or materials are too saturated to air-dry effectively. You may need to remove and replace these materials rather than continuing to dry them. This is especially common with thick insulation and carpet padding. Sometimes removing materials is necessary to prevent mold after water damage.When to Call a Professional to Prevent Mold After Water Damage
- Water damage affects more than 10 square feet
- Water source is contaminated (sewage, flooding, gray water)
- Visible mold appears or musty odors develop
- Materials remain wet after 48 hours despite your efforts
- Water affected HVAC systems or electrical components
- You discover hidden moisture in wall cavities or subfloors
- Structural materials like floor joists or wall studs are affected
- Anyone in your household has respiratory issues or immune concerns
Long-Term Mold Prevention Strategies
Once the immediate crisis is resolved, implement these strategies to prevent mold after water damage from recurring and maintain a healthy home environment:- Maintain indoor humidity below 50%: Use dehumidifiers in naturally damp areas like basements to prevent mold after water damage
- Ensure proper ventilation: Run bathroom exhaust fans during showers and for 30 minutes after to prevent mold after water damage
- Fix leaks promptly: Address plumbing issues, roof leaks, and foundation cracks immediately
- Improve drainage: Ensure gutters are clean and ground slopes away from your foundation to prevent mold after water damage
- Insulate cold surfaces: Prevent condensation on pipes, windows, and exterior walls
- Regular inspections: Check prone areas monthly (basements, attics, under sinks) to catch issues early and prevent mold after water damage
- Use mold-resistant products: When renovating, choose mold-resistant drywall and paint
What Success Looks Like When You Prevent Mold After Water Damage
You've successfully prevented mold growth when:- ✅ All moisture readings return to normal levels within 5 days when you prevent mold after water damage
- ✅ No musty or damp odors are present
- ✅ Surfaces look and feel completely dry
- ✅ No visible mold growth appears in the 2 weeks following water damage
- ✅ Indoor humidity stabilizes at 30-50% thanks to your efforts to prevent mold after water damage
- ✅ Materials can be reinstalled without concern
Preventive Maintenance Tips
The best mold prevention strategy is avoiding water damage entirely. These proactive steps help you prevent mold after water damage before problems start:- Inspect your roof annually and after severe storms to prevent mold after water damage
- Clean gutters and downspouts twice yearly
- Check under sinks and around toilets monthly for leaks to prevent mold after water damage
- Test your sump pump every spring before rainy season
- Inspect washing machine hoses annually; replace every 5 years to prevent mold after water damage
- Know where your main water shutoff is located
- Consider installing water leak detection sensors in high-risk areas
- Maintain HVAC systems to prevent condensation issues and prevent mold after water damage
Frequently Asked Questions About How to Prevent Mold After Water Damage
How quickly does mold grow after water damage?
Can I prevent mold with just fans, or do I need a dehumidifier?
Is bleach effective for preventing mold after water damage?
What's the biggest mistake homeowners make when trying to prevent mold?
How long should I run dehumidifiers and fans after water damage?
Your Next Steps to Prevent Mold After Water Damage
Acting quickly is your best defense against mold after water damage. If you're within the first 24 hours, start with water extraction and fans immediately. If you're beyond 48 hours or overwhelmed by the extent of damage, professional help ensures thorough drying and proper mold prevention. Every hour counts when you need to prevent mold after water damage. Water damage can escalate quickly, and hidden moisture creates health hazards you can't see. When in doubt, get a professional assessment—it's always better to be safe than to discover a mold problem months later that could have been prevented. Taking the right steps now helps you successfully prevent mold after water damage. Contact us for a free assessment and expert guidance.Categories
Need Restoration Services?
Our team is available 24/7 for emergency response. Call us today for a free phone consultation.


Questions About Restoration?
Our experts are ready to help. Contact us for a free consultation.