Frozen Pipe Prevention and Thawing: Complete Winter Plumbing Protection
Tyler McClelland leads mitigation operations for Advanced DRI across New York's Hudson Valley, directing water, mold, and large-loss response in the field. He holds IICRC Water Restoration Technician (WRT) and Applied Microbial Remediation Technician (AMRT) certifications and a New York State Mold Supervisor certification, and is trained in IRCA hospital safe construction practices recognized by The Joint Commission.

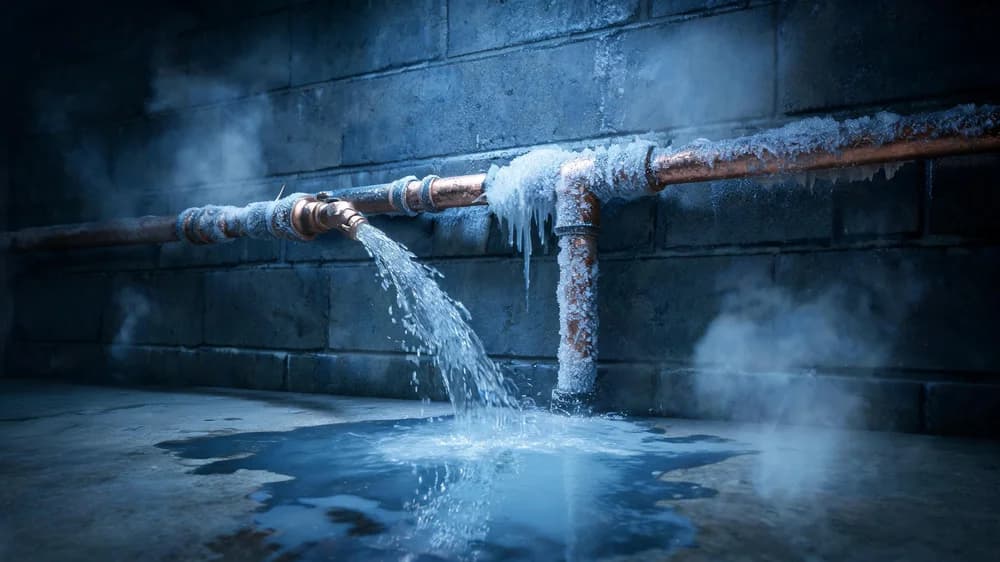
Comprehensive frozen pipe prevention and safe thawing techniques. Protect your plumbing from winter freezing and prevent costly burst pipe damage.
What You'll Need for Frozen Pipe Prevention
Tools:
- Hair dryer or heat gun (essential for thawing)
- Infrared thermometer (to locate frozen sections)
- Pipe insulation foam (critical for protection)
- Space heater (small, safe model)
- Bucket and towels (for any leaks)
- Flashlight (for inspecting dark areas)
Materials:
- Foam pipe insulation (measure your pipe diameter first)
- Heat tape or cable (UL-listed, for vulnerable pipes)
- Faucet covers (outdoor spigots)
- Weather stripping (seal crawl space vents)
- Towels or newspaper (temporary insulation)
Time Required:
⏱️ Prevention Setup: 2-3 hours (one-time preparation) ⏱️ Pre-Freeze Prep: 15-20 minutes (each cold snap) ⏱️ Thawing a Frozen Pipe: 30-90 minutes ⏱️ Emergency Response: Immediate action required
⚠️ Safety First
- Know where your main water shutoff valve is located
- Never use open flames (blowtorch, propane heater) to thaw pipes
- Keep space heaters away from flammable materials
- Wear safety glasses when working in crawl spaces
- Test all electrical heating devices before use
- Have emergency contact numbers ready
Understanding Frozen Pipe Prevention Basics
Pipes freeze when water inside them reaches 32°F (0°C). However, effective freeze protection isn't just about temperature—it's about water movement, insulation, and airflow. Pipes in unheated areas like crawl spaces, attics, exterior walls, and garages are most vulnerable to freezing. Even indoor pipes can freeze if they're against exterior walls or in poorly insulated areas. The key to successful frozen pipe prevention is addressing three critical factors: keeping pipes warm, keeping water moving, and protecting vulnerable areas before temperatures drop. Understanding these principles helps you create a comprehensive strategy for your home.
Part 1: Long-Term Prevention Strategies
Step 1: Identify Vulnerable Pipes in Your Winter Plumbing System 🔍
Walk through your home and identify pipes at risk of freezing. Check your crawl space, attic, garage, and any exterior walls. Look for pipes in unheated areas or those close to outside walls. Use an infrared thermometer during cold weather to find cold spots along your plumbing lines. Take photos and make notes about each vulnerable location—this map will guide your protection efforts throughout the winter season. 💡 Why this matters: You can't implement effective freeze protection for pipes you don't know about. Most burst pipes happen in areas homeowners forgot to check during their preparation.
Step 2: Insulate Exposed Pipes 🔧
Wrap vulnerable pipes with foam pipe insulation as your first line of defense for frozen pipe prevention. Measure your pipes first (most residential pipes are ½" or ¾" diameter). Slide the foam over the pipe and seal the seam with the adhesive strip or tape. Pay special attention to the first few feet of pipe entering your home and any pipes in unheated spaces. For extra protection in extreme cold areas, consider adding heat tape underneath the insulation. ✅ Success indicator: No gaps in insulation coverage, and foam feels snug around the entire pipe. Proper insulation is fundamental to prevention.
Step 3: Seal Air Leaks to Protect Winter Plumbing 🌬️
Cold air reaching your pipes can freeze them even if they're insulated, compromising your protection efforts. Seal cracks and holes in exterior walls, around pipes entering the home, and in foundation walls. Use weather stripping for crawl space vents, but remember to reopen them in spring to prevent moisture problems. Foam sealant works well for small gaps around pipe penetrations. ⚠️ Warning: Don't permanently seal crawl space vents—they're needed for moisture control in warmer months.
Step 4: Install Heat Tape on Critical Pipes ⚡
For pipes that repeatedly freeze or are impossible to insulate properly, UL-listed heat tape or cable provides reliable freeze protection. Follow manufacturer instructions carefully—incorrect installation can create fire hazards. Wrap the cable in a spiral pattern along the pipe, then cover with pipe insulation. Plug into a GFCI outlet and consider using a thermostat controller to activate it only when needed. If a burst pipe causes structural damage, our emergency board-up services can secure your property immediately. 🔴 Safety note: Never overlap heat tape on itself, and never use damaged or frayed cables.
Step 5: Protect Outdoor Faucets 🚰
Disconnect and drain all garden hoses before the first freeze. Turn off the water supply to outdoor faucets using the interior shutoff valve, then open the outdoor faucet to drain any remaining water. Install insulated faucet covers over all outdoor spigots as part of your frozen pipe prevention checklist. These inexpensive covers provide crucial protection for hose bibbs, which are extremely vulnerable to freezing. ✅ Success indicator: No water drips from outdoor faucet when opened, and cover fits snugly to ensure proper protection.
| Prevention Method | Protection Level | Best For | Maintenance |
|---|---|---|---|
| Pipe Insulation | Good (down to 20°F) | Moderately exposed pipes | Check annually |
| Heat Tape | Excellent (down to -20°F) | Extremely vulnerable pipes | Inspect before each winter |
| Faucet Covers | Good (down to 25°F) | Outdoor spigots | Install each fall |
| Air Sealing | Very Good (support method) | All exposed pipe areas | Check during home inspection |
Part 2: Pre-Freeze Preparation (Before Cold Snaps)
When the forecast shows temperatures dropping below 20°F, take these quick actions to protect your winter plumbing system:
Step 1: Open Cabinet Doors 🚪
Open cabinet doors under sinks, especially those on exterior walls. This allows warm air from your home to circulate around the pipes, providing immediate protection. This simple step can make the difference between safe pipes and a freezing disaster. Move any cleaning products or chemicals away from the area if you have children or pets.
Step 2: Let Faucets Drip for Winter Plumbing Protection 💧
Allow both hot and cold water to drip from faucets served by exposed pipes. A drip about the size of a pencil lead is sufficient—you don't need a stream. Moving water is much harder to freeze than still water, making this an essential technique. Focus on faucets connected to pipes in vulnerable locations you identified earlier. 💡 Pro tip: The small amount of water used during a cold snap is far cheaper than repairing a burst pipe. This simple method has saved countless homes from disaster.
Step 3: Maintain Steady Heat ♨️
Keep your thermostat at the same temperature day and night as part of your frozen pipe prevention strategy. While it might cost a bit more in heating bills during the cold snap, it's far less than water damage repairs. If you're leaving home, never set the thermostat below 55°F. Consider placing a small space heater (with automatic shutoff) in vulnerable areas like crawl spaces—but never leave it unattended. If your heating system fails during winter, contact our emergency heating services immediately.
Step 4: Keep Garage Doors Closed 🚗
If you have water supply lines in your garage, keep the garage door closed as much as possible. Protect these pipes the same way you would exterior pipes—they're essentially in an unheated space during winter and require the same attention.
Part 3: Safe Pipe Thawing Techniques
If you turn on a faucet and only a trickle comes out, you likely have a frozen pipe. Here's how to safely perform pipe thawing without causing damage:
Step 1: Locate the Frozen Section 🔎
Follow the affected pipe from the faucet back toward the main line, feeling for cold spots. An infrared thermometer helps pinpoint the exact frozen section. Look for frost or bulging on exposed pipes. Check the most likely spots first: pipes along exterior walls, in crawl spaces, or in unheated areas.
Step 2: Open the Faucet Before Thawing 🚰
Before beginning any pipe thawing work, open the faucet served by the frozen pipe. As ice melts, water and steam need somewhere to go. Keep both hot and cold sides open slightly. This also lets you monitor progress—when full flow returns, you've succeeded.
Step 3: Apply Gentle Heat for Safe Pipe Thawing 🔥
Use an electric hair dryer, heat lamp, or portable space heater to warm the pipe gradually. Start at the faucet end and work back toward the frozen area—this lets melting water escape. Keep the heat source moving and never leave it unattended. Wrap the pipe in towels soaked in hot water for additional heat transfer. Patient, gentle heating prevents pipe damage. ✅ Safe heat sources for pipe thawing:
- Electric hair dryer (most common and effective)
- Heat lamp positioned 6-12 inches from pipe
- Electric heating pad wrapped around pipe
- Hot towels replaced frequently
- Space heater warming the entire area
🔴 NEVER use these:
- Propane or kerosene heaters
- Blowtorch or open flame
- Charcoal grill or fire
- Any device that could ignite surrounding materials
Step 4: Check for Leaks During Thawing 💦
As the pipe thaws, watch carefully for leaks. Have towels and a bucket ready. If you see water escaping from the pipe, shut off the main water supply immediately and call a professional. Small cracks or splits aren't always immediately obvious—they might only leak when full water pressure is restored. ⚠️ Warning: If the frozen pipe is inside a wall or ceiling, you'll need professional help. Don't cut into walls yourself.
🔴 When to Call a Professional
- You can't locate the frozen section of pipe
- The frozen pipe is inside a wall, ceiling, or floor
- You see bulging or cracks in the pipe
- Water is leaking from the pipe during thawing attempts
- Multiple pipes are frozen throughout your system
- You don't have safe access to the frozen pipe
- The pipe remains frozen after 30-45 minutes of thawing attempts
- You smell gas or see signs of electrical problems
Troubleshooting Common Issues
Problem: Pipe keeps freezing in the same spot
Solution: That location needs better freeze protection with improved insulation or heat tape. The pipe may be in a particularly cold area with inadequate protection. Consider having a professional assess whether the pipe can be rerouted to a warmer location.
Problem: No water from multiple faucets
Solution: Your main water line may be frozen, or multiple pipes are affected. This requires professional help—don't delay calling. The situation is more serious than a single frozen pipe and needs expert service.
Problem: Pipe bulges or looks deformed
Solution: Don't attempt thawing. The pipe has already been damaged by ice expansion and may burst. Turn off water to that section and call a plumber immediately. This pipe will need replacement.
Problem: Water pressure returns but seems weak
Solution: You may have a small leak or partial blockage from ice crystals. Monitor closely and have your system professionally inspected. What seems minor now could become major damage later.
Prevention Maintenance Schedule for Winter Plumbing
Fall (Before First Freeze):
- Disconnect and drain outdoor hoses
- Install faucet covers
- Inspect and replace damaged pipe insulation
- Test heat tape systems
- Seal new air leaks
During Cold Snaps:
- Open cabinet doors
- Let vulnerable faucets drip
- Maintain steady indoor temperature
- Check exposed pipes in mornings
Spring (After Last Freeze):
- Reopen sealed crawl space vents
- Inspect pipes for any winter damage
- Note any problems for next year's plan
- Remove and store faucet covers
Professional Winter Plumbing Protection Services
While these DIY steps provide excellent protection, some situations benefit from professional help. A qualified plumber specializing in winter plumbing can:
- Install heat tape systems with automatic temperature controls
- Reroute vulnerable pipes to warmer locations
- Add insulation to hard-to-reach areas
- Inspect your entire system for freeze risk factors
- Upgrade your plumbing in chronically cold areas
If you experience repeated freezing problems despite following frozen pipe prevention steps, professional assessment can identify issues you might miss. Advanced DRI works with trusted plumbing professionals who specialize in protection and can recommend permanent solutions for your specific situation.
Frequently Asked Questions
At what temperature should I start worrying about frozen pipes?
How long does it take to thaw a frozen pipe safely?
Is it better to let faucets drip or turn off water when leaving for winter vacation?
Can pipes freeze if my house is heated?
What's the biggest mistake people make with frozen pipes?
Protecting Your Home This Winter
Effective frozen pipe prevention combines preparation, monitoring, and quick response. By implementing these freeze protection strategies before cold weather arrives, you'll protect your plumbing system from one of winter's most expensive disasters. Remember that prevention is always easier and cheaper than repair—a few hours of preparation can save thousands in damage from burst pipes. If you do experience frozen pipes or water damage despite your best efforts, professional help is just a phone call away. Advanced DRI specializes in emergency water damage restoration and works with qualified plumbing professionals to resolve emergencies quickly and completely, including expert pipe thawing and protection services. Learn more about our complete residential restoration services.
Categories
Need Restoration Services?
Our team is available 24/7 for emergency response. Call us today for a free phone consultation.
Questions About Restoration?
Our experts are ready to help. Contact us for a free consultation.